

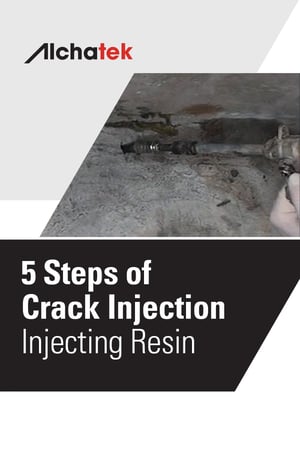
 Finally! We are at the last basic step. Now for the fun part - injecting the polyurethane resin. If you only have one pump, be sure to flush the pump out completely with AP Pump Flush before you pump the resin.
Check your safety gear - safety glasses are the most important item. Put on two pairs of latex gloves (so you can easily slip on a new pair once the outer pair gets sticky - it is tough to slide fresh gloves over sweaty hands.)
Turn the pump pressure all the way down. Squirt some resin into a cup to make sure the resin is clean. Start at the lowest port and slowly crack the valve. This is a two-man job (unless it is a small job). Have your partner slowly turn up the pressure as needed. Develop hand signals if the job site is noisy from a generator.
If the resin is flowing, keep pumping. If not, slowly adjust the pressure. Here comes the art of the game. You have two ways to control the flow of the resin. The pump operator can control the pressure and the valve operator can control the flow. The more experienced technician should control the show.
If I am on the valve, I will tell the pump operator how high to turn up the pressure. I will close the valve while this is being done. Once the pressure is up, I will control the flow of the resin from the valve. Very slowly cracking it open. This way, if I feel a shear start to form, I have a split second to close the valve.
If I am on the pump and the valve operator is less experienced, I will have them open the valve and I will control things with the pump pressure. I will turn it up and down as necessary. It is better to have the valve operator control the show in most circumstances since that person is closer to the action.
When to stop? My rule is this - if the resin is flowing, keep pumping. What if it starts to run out the face of the crack? Again, my rule is this - if more resin is going in than is coming out, keep pumping. You only have a few minutes to get the resin where it needs to be. As the resin reacts with water it starts to thicken up and becomes more difficult to push into the tighter recesses of the crack.
If raw resin comes out of the crack (amber resin, not a white foam), then it is time to stop. This resin will seal the crack, but at this point, there is not much water for it to react with and it will cure slowly. Stop injecting and move to the next port because it will be slow to seal. It is better to see white foam coming out of the face of the crack.
What happens if the foam travels past the next port - should you stop? No way. This is a home run. In most cases, the further along the face of the crack the resin travels, the deeper it is traveling as well. This gives you a better seal.
If too much resin is flowing out or washing out due to high water flow, you can use Spetec Oakum and a screwdriver to create a temporary plug (large or small) to give the resin time to react, expand, and seal the leak.
Congratulations, you have completed the 5 Steps of Crack Injection blog series!
5 Steps of Crack Injection - Overview
5 Steps of Crack Injection - 1. Drilling Holes
5 Steps of Crack Injection – 1. Drilling Holes (Continued)
5 Steps of Crack Injection – 2. Flushing Holes
5 Steps of Crack Injection – 3. Installing Ports
5 Steps of Crack Injection – 4. Flushing Cracks
5 Steps of Crack Injection – 5. Injecting Resin
Please feel free to call us at 404-618-0438 and ask any questions.
Want in-depth info on crack injection procedures and products?

